Thursday, June 23, 2011

Beach Lime Pie with Meringue


Well, I couldn't find key limes, so I had to get a bit creative with the name. I'm vacationing at Topsail (Top-sul) Island this week, and I thought that you couldn't get much beachier than a key lime pie. I didn't bring any prep tools or ingredients to the beach with me, which I discovered about an hour ago to be a MISTAKE. The beach house didn't have a juicer, so I hand squeezed all of the limes (not too difficult, just messy), I didn't have a measuring cup, so I had to guesstimate on the lime juice by filling half of a small juice glass with lime juice, (I mean, it said half a cup, right?) and I literally used "table spoons" to measure out the sugar for the meringue. At least I found a hand mixer in the back corner of the one of the cabinets! I didn't know how many limes would make 1/2 cup of lime juice, so I bought 6 limes, which was 3 limes over the limit; luckily, that gave me plenty of limes for decoration on top of the pie! Also, I made my life a whole lot easier and bought a pre-made graham crust (which I recommend if you are at the beach and want your life to be without stress). It would be pretty to mix a tablespoon of lime zest into the filling, but I couldn't find a zester. It still tastes awesome without it though! 


Sophia was extremely interested in the limes, and even tried to lick them until she realized they weren't peanut butter/chicken/other delicious treats she isn't supposed to eat. Then she wandered away.


Hand squeezing the limes weren't as bad as I expected. I mean, lime juice did go everywhere, but at least it didn't end up in my eyes. I've also heard rumors of an elusive product called key lime juice that would probably be good (but not as good as fresh squeezed limes) in the pie.Coincidentally, I toured a beach house on the south end of the island, and THEY had a zester, juicer, can opener, AND measuring spoons. We reserved that beach house for next year :)


My handy boyfriend managed to find some sort of tool that punches holes in cans, and I used that in place of a can opener, and it worked!


I would've liked if the pie filling came up higher in the pan; I might use an 8 inch crust next time, but that's just personal preference.


After baking, the pie should be firm in the center, and wiggly around the edges. 


I completely forgot to photograph the meringue process, but it really isn't difficult, and it only took me five minutes, tops.


My filling wasn't as set/chilled as I would've liked, but I'd already cut the piece by then. It was delicious though, and as I type this my family is preparing Philly Cheesesteaks, and the pie will be dessert tonight! Also, this pie took only 15 minutes to make in prep time.


Beach Lime Pie with Meringue
adapted from All Recipes

Ingredients


  • 5 egg yolks, beaten
  • 1 (14 ounce) can sweetened condensed milk
  • 1/2 cup key lime juice/juice of 3 or 4 regular limes
  • 1 (9 inch) prepared graham cracker crust
  • 4 egg whites
  • 6 tablespoons granulated sugar

Directions

  • Preheat oven to 375 degrees F (190 degrees C).
  • Combine the egg yolks, sweetened condensed milk and lime juice. Mix well. Pour into unbaked graham cracker shell.
  • Bake in preheated oven for 15 minutes. Allow to cool.
  • To make the meringue, in a large glass or metal bowl, whip the egg whites until foamy. Add sugar gradually, and continue to whip until stiff peaks form. Spread meringue over pie, sealing the edges at the crust.
  • Bake in preheated oven at 350 degrees F for 10 minutes, or until meringue is golden brown.


Wednesday, June 15, 2011

Blueberry Buckle Cake


Blueberries were on sale today, so I bought a pint! I originally wasn't going to bake anything with them, (just eat them!) but then I found my berry themed recipe book, so OF COURSE, I then had to make a blueberry themed dessert! This cake is perfect for people who don't like a lot of sugar; the berries give it a slightly tart flavor that counteracts the sweetness. If you don't have blueberries, you can easily replace them with a pint of other fruit, such as raspberries and blackberries.


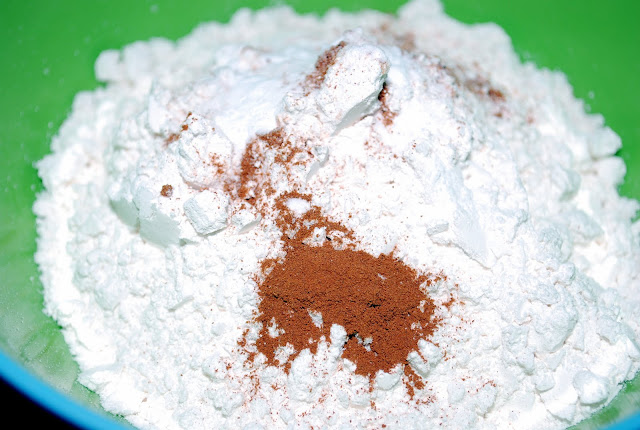
This will hopefully be the last overly flashed photograph of the ingredients in this blog; I will be photographing everything I can outside from now on because the outside light is so much better. I have a bad habit of making my desserts at night in my past blog entries, but I'll be waking up early from now on!


 Be gentle when folding in the blueberries so that they don't burst.


 This streusel topping is SO DELICIOUS. I mean, it has to be because two of the main ingredients are brown sugar and butter.


This dessert would be delicious served with a generous helping of cinnamon whipped cream!


Recipe adapted from Luscious Berry Desserts 

INGREDIENTS
  • 2 cups all purpose flour
  • 2 teaspoons baking powder
  • 1/4 teaspoon salt
  • 6 tablespoons (3/4 stick) unsalted butter, room temperature
  • 1/2 cup granulated sugar
  • 1 large egg
  • 1 teaspoon lemon zest
  • 1 teaspoon vanilla extract
  • 1/2 cup whole milk (I used 2% milk and it turned out fine)
  • 1 pint blueberries
  • 1 tablespoon lemon juice


TOPPING
  • 1/3 cup all purpose flour
  • 1/4 cup packed brown sugar
  • 1/4 teaspoon cinnamon
  • 1/4 cup (1/2 stick) cold unsalted butter cut into small pieces

    DIRECTIONS
    • Preheat oven to 375 degrees F, and butter an 8-inch square baking pan.
    • For the cake: mix together the flour, baking powder, and salt in a medium bowl.
    • Beat butter with an electric mixer on medium-high in a large bowl until light and fluffy. Gradually add the sugar and beat until light and fluffy. Add the zest, egg, and vanilla and beat until blended. Stir in the milk with a rubber spatula, then stir the flour mixture into the butter mixture with the rubber spatula. The batter will be very thick. Toss together the blueberries and lemon juice in a small bowl and gently fold into the batter. Transfer to the prepared pan and smooth the top with a rubber spatula. 
    • For the topping: Whisk together the flour, brown sugar, and cinnamon in a small bowl. Cut in the butter with a pastry blender or two knives until the largest pieces of butter are the size of small peas. Sprinkle over the batter.
    • Bake the cake for 30 to 35 minutes until a toothpick inserted in the center of the cake comes out clean. Cool in the pan on a wire rack for 15 minutes.
    • Cut the cake into 9 squares and serve warm!


    Thursday, June 9, 2011

    Spiced Banana Bread


    I actually was making guava pastries for a local restaurant, Carlos CafĂ©, (which I, of course, forgot to photograph) when I noticed that I had about 4 or 5 bananas that were almost over-ripe. Banana bread and banana pudding are the easiest ways to use up bananas, but I didn't have any heavy whipping cream in the house to use to make the vanilla custard layer or Nilla wafers, but I did have all of the ingredients to make banana bread! I took a basic recipe and added a few more spices  (nutmeg, cinnamon) to make it more interesting. This was my first time making it, and I would definitely make it again: it would probably freeze well and be good as gifts, late night snacks, whatever. 


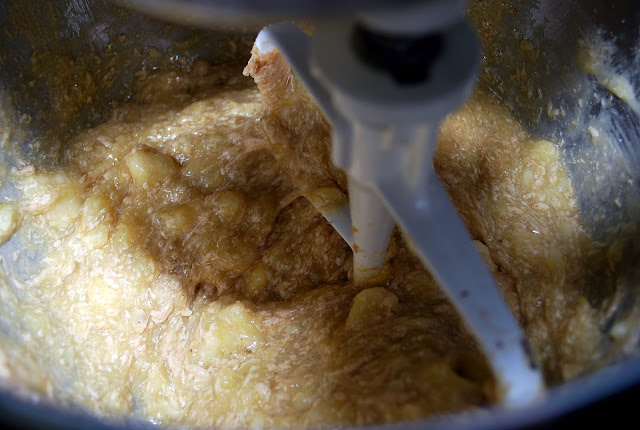
    I've never really mashed bananas before, and they went from decently firm to soggy, watery mess in about 2 minutes. Still tasted good  though :)


    This bread didn't last very long at my house; whenever I meet one of my friends to hang out, I always bring a piece of whatever dessert I happen to be making at the time and I was reaaaally busy this week. I also recently got a summer job, so they will probably be getting some of my desserts too!

    INGREDIENTS
    • 2 cups all-purpose flour
    • 1 teaspoon baking soda
    •   1/4 teaspoon salt
    •  ¼ teaspoon cinnamon
    • ¼ teaspoon nutmeg
    • 1/2 cup unsalted butter
    •  3/4 cup brown sugar
    •  2 eggs, beaten
    •  2 cups mashed overripe bananas
    DIRECTIONS
    • Preheat oven to 350 degrees F. Lightly grease a 9x5 inch loaf pan. 
    • In a large bowl, combine flour, salt, baking soda, cinnamon, and nutmeg. In another bowl, cream together the butter and brown sugar. Stir in eggs and mashed bananas until well blended. Stir banana mixture into flour mixture; stir just to moisten. Pour batter into the prepared loaf pan.
    •   Bake in preheated oven for 60 to 65 minutes, until a toothpick inserted into center of the loaf comes out clean. Let bread cool in pan for 10 minutes, and then turn out onto a wire rack.


    Friday, June 3, 2011

    Yellow Cake with Chocolate Frosting


    Since my biscotti recipe yesterday was a complete fail, I needed to make another recipe today. I was looking through my cookbooks and chose this recipe because of my childhood memories of homemade birthday cakes that were very similar to this one. I'm also really excited to make a layer cake because my cake pans have been missing for over a year, and I finally found them hidden in a back corner a week ago. Also the focus on my camera seems to be messed up, so please bear with me while I get that figured out.


    After I added all of the ingredients, the batter was very silky and smooth. I divided the batter among the cake pans and put them in the oven. I didn't turn the cakes halfway through because I went to open the oven door, and the cakes looked like they were in their iffy 'If you touch me or even breathe on me, I'm going to fall' stage. But they turned out well without that anyways.


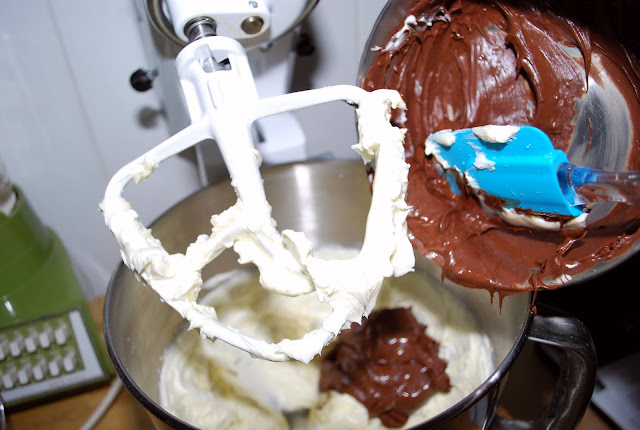
    This icing IS SO GOOD. For real. I ate about a ton of it while icing the cake. That's probably why there isn't a lot of filling in the middle of the cake along with the fact that I was afraid that I would run out of icing. HAH, I had SO MUCH ICING left over, it was ridiculous. 


    Also, a tip I learned is that when you're icing a cake, place pieces of parchment paper under it so that the icing doesn't get on the cake dome or plate, although I managed to do both even with the paper!


    Recipe adapted from Martha Stewart

    Makes one 9 inch layer cake
    • 2 sticks unsalted butter, room temperature plus more for cake pans
    • 1 1/2 cups all purpose flour plus more for cake pans
    • 1 1/2 cups cake flour
    • 1 tablespoon baking powder
    • 1/2 teaspoon salt
    • 1 3/4 cups granulated sugar
    • 4 large eggs
    • 2 teaspoons vanilla extract
    • 1 1/4 cups milk
    Dark Chocolate Frosting
    • 16 ounces semisweet chocolate morsels
    • 6 tablespoons Dutch-process cocoa powder
    • 6 tablespoons boiling water
    • 3 sticks unsalted butter, room temperature
    • 1/2 cup powdered sugar
    • pinch of salt
    • Preheat oven to 350 degrees. Butter two 9-by-2-inch round cake pans; line the bottoms with parchment paper. Butter parchment, and dust with flour, tapping out excess; set aside. Into a medium bowl, sift together flours, baking powder, and salt; set aside.
    • In the bowl of an electric mixer fitted with the paddle attachment, beat the butter and sugar until light and fluffy, 3 to 4 minutes, scraping down the sides of the bowl as needed. Beat in eggs, one at a time, then beat in vanilla. With the mixer on low speed, add the flour mixture in three parts, alternating with the milk and beginning and ending with the flour; beat until combined after each addition.
    • Divide batter between the prepared pans, and smooth with an offset spatula. Bake, rotating the pans halfway through, until cakes are golden brown and a cake tester inserted into the center comes out clean, 30 to 35 minutes. Transfer pans to a wire rack to cool 20 minutes. Invert cakes onto the rack; peel off the parchment. Reinvert cakes and let them cool completely, top sides up.
    • Place chocolate in a double boiler or heatproof bowl over simmering water. Turn off the heat; stir occasionally until chocolate was melted completely, about 15 minutes. Set bowl on counter top, and let chocolate cool to room temperature, about 25-30 minutes. Meanwhile, combine cocoa powder and boiling water in a small bowl; stir until cocoa is dissolved.
    • In the bowl of an electric mixer fitted with the paddle attachment, beat butter, powdered sugar, and salt on medium-high until light and fluffy, 3 to 4 minutes. Add melted chocolate; beat on low speed until combined, scraping down the sides of bowl as needed. Beat in the cocoa mixture, then frost your cake!
    • Use 3/4 cup of icing or more in the middle of the cake, then use the rest of the icing for the sides and top. Cake can be put in fridge, covered, for up to three days.