Showing posts with label chocolate. Show all posts

Wednesday, February 27, 2013

1st Place Chocolate Strawberry Cupcakes


Last year, I won 3rd place in the Decadent Dreams Chocolate Festival's Cupcake Wars with a Raspberry and Chocolate cupcake, and this year, I won 1st place! I entered a Strawberry Chocolate cupcake made with local winter strawberries from the Bush N Vine. They were FANTASTIC!! One of the judges came up to me afterwards, and he was like, "How did you get it so moist??!" I have no idea how it ended up so moist, I guess the recipe was just perfect!


These strawberries were so perfect. If I had been unable to get local strawberries, I would've made a completely different cupcake because the supermarket strawberries just don't compare.

Sunday, November 18, 2012

German Chocolate Cupcakes


This is one of the MOST DELICIOUS cupcakes I have ever eaten. And I have eaten far too many cupcakes to count. The light, airy cupcake is decadently balanced by the rich, creamy coconut and pecan filling. This past summer, I interned for 100 hours with a dietitian in my hometown for one of my nutrition classes. I interned at a nursing home, and I was able to learn so much about gerontology and the diets of the elderly. So anyways, when my internship was coming to a close, I asked Ken (the dietitian) what his favorite desserts were, and the first thing he said was "German Chocolate Cake"! So I decided to turn it into a cupcake (way less messy and more share-able). 


Well, he loved the cupcakes and so did everyone else! I am definitely filing this recipe away for my future cupcake making business. Also, in the photo above, is a mixture of milk (I used 2%) and lemon juice. Buttermilk is so expensive and usually goes to waste at my house, so I just decided to make my own. Much cheaper and better for me!


Friday, January 27, 2012

Mocha Cupcakes


And so begins the Valentine's Day desserts. 
I absolutely LOVE Valentine's Day. It's a win-win. I get presents, flowers, chocolates, AND dinner! Sorry to all guys out there, although I am low-maintenance most days of the year, Valentine's Day is definitely not one of them. Luckily, I have a wonderful boyfriend that coooompletely understands ;) These cupcakes are perfect: the icing is fluffy and light and mimics the coffee undertones in the cupcake. Plus, sprinkles make everything more amazing.


Oh, by the way, about a week ago, I applied for a research assistant position offered by the one and only Tucker Max. He's a comedy writer who has written titles such as I Hope They Serve Beer in Hell and Assholes Finish First. He is absolutely HYSTERICAL, and I jumped at this wonderful opportunity to work for him. I made it to the second cut, and I will hear back (or not) by January 30th. I'll be sure to keep y'all updated!


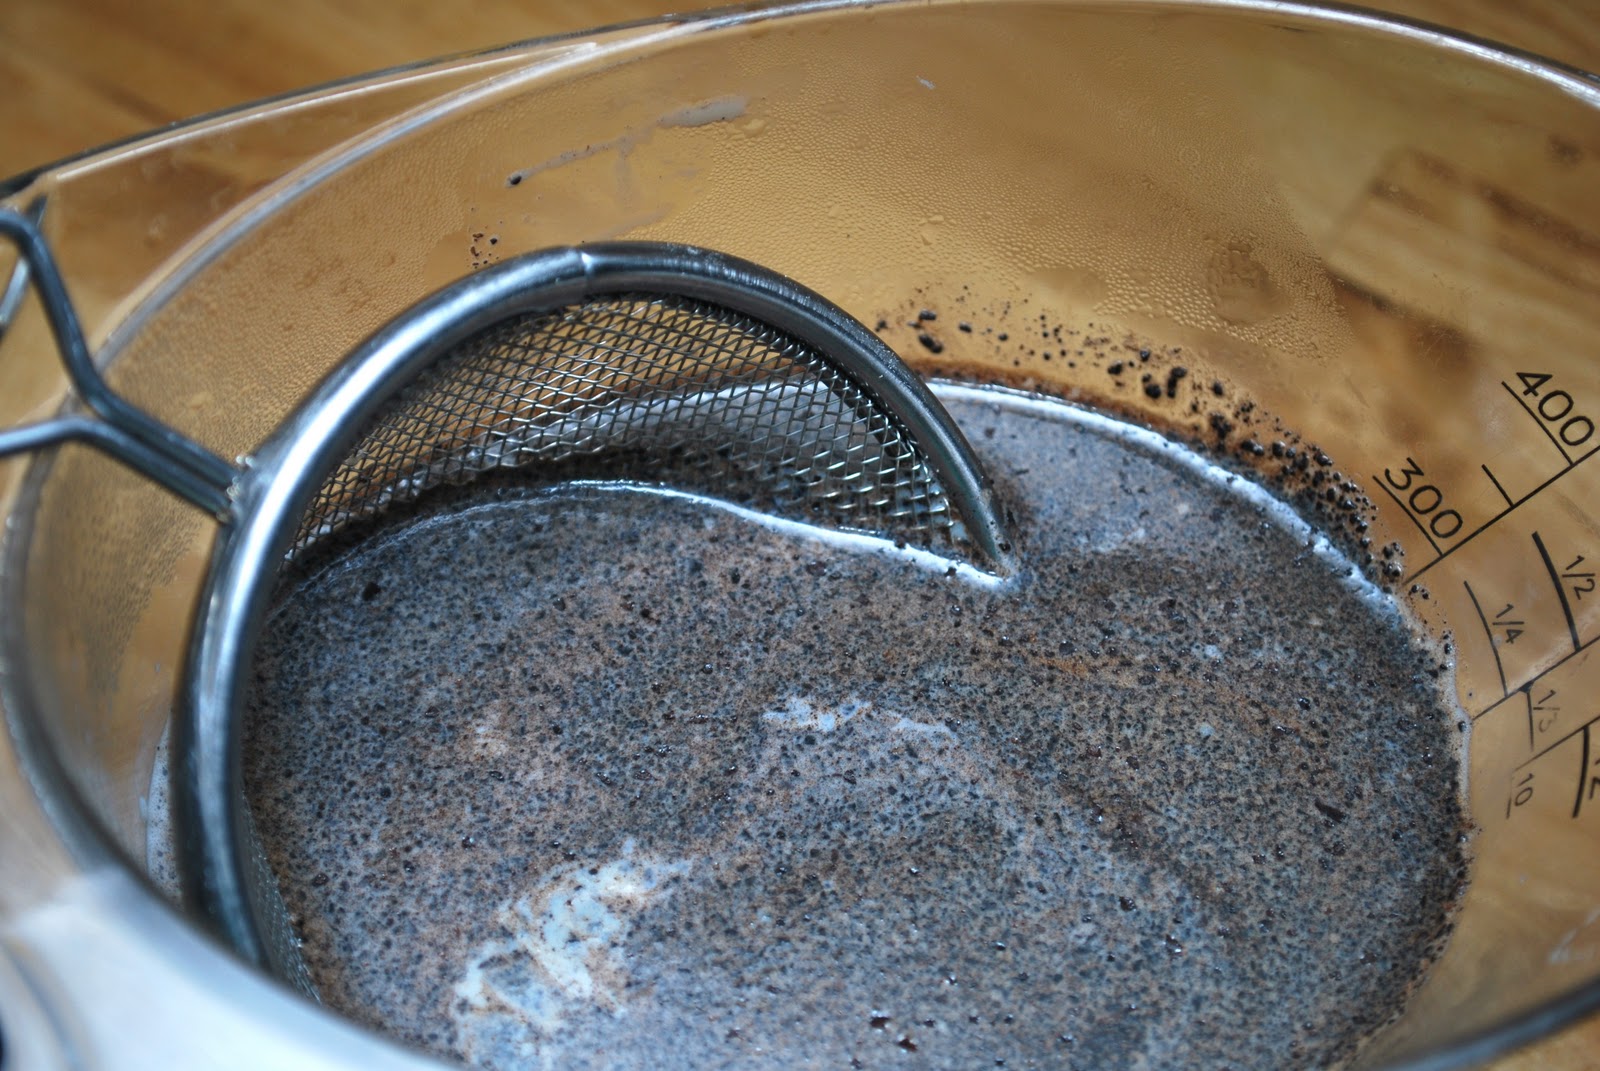
I didn't have espresso powder or a small sieve, so I used a larger sieve and filtered the coffee-infused milk through 5 times before adding to the sugar mixture. As you can see, there were still coffee granules in the batter, but it didn't make a difference in the end product. This recipe makes 12 perfectly sized cupcakes, but if I made it again, I would definitely double it. 


Thursday, November 10, 2011

Chocolate Wasted Cake


My boyfriend's 21st birthday was this past weekend, and this cake seemed totally appropriate. It's chocolate on top of chocolate on top of even MORE chocolate! It's insane. I had to choose between this cake and an Oreo cake, but I really just wanted to go crazy and throw tons of chocolate on a cake. Seriously, that's what you do. And what could be better? Also, chocolate has phytochemicals, which are good for you. Trust me, I'm a Nutrition major ;)


Sadly, my first wonderful cake fell. I waited too long after adding the baking soda to the wet ingredients (about 12 minutes; I was hastily buttering the pans and cutting out parchment rounds) and the baking soda reacted before I had a chance to put it in the oven. I had to resort to box mix for the cake layers, but feel free to try the original cake layer recipe. It has had many good reviews on the original website. All cake batter photographs are from the original cake recipe, not the box mix version. (I used Betty Crocker Super Moise Triple Chocolate Fudge mix).


Monday, October 10, 2011

Espresso Chocolate Chip Shortbread Cookies


These cookies are. so. addicting. I ate one nonchalantly and before I knew it, I had eaten 6. SIX. In less than ten minutes. Thank goodness I had a lot left to take to my family reunion that day. They are buttery, melt-in-your mouth, chocolately delicious. Perfect for parties, potlucks, hoarding, whatever. Oh, and be on the lookout for Halloween specials! I will post at least 5 Halloween-themed desserts! What would you like to see?


I didn't have any espresso powder on hand, so I used instant coffee. If you're looking for a deeper intense coffee flavor, use the instant espresso powder and toss in some Kahlua.

Monday, September 26, 2011

Chocolate Chip Zucchini Bread


Since it's been so dreary outside these past few days, I figured everyone could use a comfort food post. Zucchini bread is one of those things that you eat while curled up watching the rain fall (at least that's how it was in my house), and this transition into fall is the PERFECT time to make it! This recipe makes two loaves- perfect for sharing or freezing.


My garden produced copious amounts of zucchini this year, so I had plenty to work with. 


Saturday, September 10, 2011

Chocolate Whoopie Pies


These were my first experience at making whoopie pies, and I was so pleased by the results! The first time I made them with a seven minute frosting (as pictured), and the second time I used a marshmallow creme filling. Both are delicious: the seven minute frosting is much airier and lighter, and the marshmallow creme is for those of you that love a filling with more substance. The seven minute frosting only keeps for a few hours before separating, so be sure to make it right before you plan to serve the whoopie pies. The marshmallow creme filling doesn't seem apt to separate, and could probably be made ahead of time. The whoopie pies last at least four days in a sealed container at room temperature.


Recently, I started collecting vintage cooking items for my soon-to-open Etsy store. This is my first experience with selling items, and I am SO EXCITED about it! I will be sure to update everyone when the items are up and put a link at the top of this website. Thank you so much for all of your support! 


If you have a large cookie scoop, then by all means use that. I haven't bought one yet, so I just used a large spoon to shape the dough. 


If you are using the marshmallow creme recipe for filling, then disregard the seven minute frosting photographs below.


Whoopie Pies
from Martha Stewart


  • 3 1/2 cups all-purpose flour
  • 1 teaspoon salt
  • 1 1/2 cups unsweetened cocoa powder
  • 1 tablespoon baking soda
  • 1 teaspoon baking powder
  • 1 cup (2 sticks) unsalted butter, room temperature
  • 2 cups sugar
  • 2 large eggs
  • 2 cups buttermilk, room temperature
  • 2 teaspoons pure vanilla extract
  • Seven Minute Frosting (recipe and ingredients below)


Directions

  • Preheat oven to 400 degrees. Sift together flour, salt, cocoa powder, baking soda, and baking powder. Set aside. Line two baking pans with Silpats (French nonstick baking mats) or parchment paper. In the bowl of an electric mixer fitted with the paddle attachment, cream butter and sugar until light and fluffy. Add eggs, buttermilk, and vanilla. Beat until well combined. Slowly add dry ingredients. Mix until combined.
  • Using a 1-ounce ice cream scoop, place cookies onto lined baking pans, 12 per pan. Bake for 12 minutes. Remove to a rack to cool. Repeat with remaining batter.
  • Spread 2 tablespoons frosting onto each of 24 cookies. Sandwich together with remaining 24 cookies.

Seven Minute Frosting

  • 3/4 cup plus 1 tablespoon sugar
  • 1/3 cup water
  • 1 tablespoon light corn syrup
  • 3 large egg whites
  • 1/4 teaspoon pure vanilla extract

Directions

  • Heat 3/4 cup sugar, the water, and
    corn syrup in a medium saucepan
    over medium heat, stirring until sugar
    dissolves. Increase heat, and bring to
    a boil. Wash down sides of pan with
    a wet pastry brush to prevent sugar crystals from forming. Cook until it registers 235 degrees on a candy thermometer.
  • Meanwhile, whisk whites with a
    mixer on medium speed until soft
    peaks form, about 2 1/2 minutes. Add
    remaining tablespoon sugar; reduce
    speed to medium-low. Pour sugar syrup
    into whites in a slow, steady stream.
    Increase speed to medium high; beat
    until stiff peaks form, about 7 minutes.
    Beat in vanilla; use immediately.

Marshmallow Crème Filling

  • 1/2 cup butter
  • 1 cup confectioners' sugar
  • 1 cup Marshmallow Fluff
  • 1 teaspoon vanilla

Directions

  • In a medium bowl with mixer at medium speed, beat butter and remaining ingredients until light and fluffy.

Saturday, September 3, 2011

Kahlua Refrigerator Pie


I received this recipe from a church member after lamenting on Facebook about how much Kahlua I had in my cabinet. She broke through the hordes of typical college students' comments to pass on a delicious, easy dessert! Monday is Labor Day, and this refrigerator pie is the perfect item to bring to the celebration!


This is the quickest dessert I've made on A Dessert a Week yet, but don't let that fool you about the taste. Once the flavors have time to mix, this dessert is as complex as any. Excluding chill time, this recipe took about 5 minutes to prepare.


If you prefer the taste of Kahlua to be more prevalent, then add 1-2 tablespoons extra.


Ta-da! Instant, delicious pie!


Ingredients:
  • 1 chocolate pie crust
  • 6 Heath Bars (or a bag of Heath Bar chips)
  • 1/4 cup chocolate chips (reserve 2 tablespoons extra for the topping)
  • 6 oz cream cheese
  • 8 oz Cool Whip
  • 1/4 cup Kahlua or to taste!
Directions:
  • Crush candy with knife blade in food processor (or with a mallet, car tires, whatever). Add cream cheese to this and process. Add chocolate chips and Kahlua and process. Pour this over Cool Whip and mix.
  • Place all in crust and put reserved chocolate chips on on top. Chill overnight or all day if possible to allow flavors to mix through. Freezes very well. You can pour extra Kahlua over the pie or drizzle some on the plate if you wish.

Thursday, July 21, 2011

Kahlua Chocolate Truffles


I was amazed after preparing this recipe (which took ten minutes tops) at just how easy it was! I used to shell out two or three dollars per chocolate truffle at Dean and Deluca but no more! This recipe made about 30 truffles. If you want to change the flavor of the truffles, just change the type of alcohol (Grand Marnier and orange zest for orange chocolate, etc) or replace the alcohol with some other flavoring. Oh, and fun fact: chocolate truffles were made to look like real truffles by chocolatiers!


I would've rather used a higher quality chocolate, (Lindt or Green and Black) but I had several bars of Ghiradelli already in the cabinet.


The easiest way to break the chocolate into small pieces without buying something expensive is just to pound it repeatedly with a mallet, hammer, or anything heavy you have lying around. It worked perfectly!


I waited about two minutes and then stirred it all up!


I rolled my truffles in cocoa powder, but other toppings could be hundreds and thousands, powdered sugar, coconut, shaved chocolate, or dip them in melted chocolate to have a hard chocolate shell. Send in pictures of your variations!

Kahlua Chocolate Truffles
adapted from Joy of Baking


INGREDIENTS:
  • 8 ounces semisweet or bittersweet chocolate, cut into small pieces
  • 1/2 cup heavy whipping cream
  • 2 tablespoons unsalted butter, cut into small pieces
  • 2 tablespoons alcohol (Cognac, brandy, Grand Marnier, kirsch, rum, bourbon, or Kahlua to name a few) (optional)


DIRECTIONS
  • Place the chopped chocolate in a medium sized heatproof bowl. Set aside. Heat the cream and butter in a small saucepan over medium heat and bring just to a boil. Immediately pour the boiling cream over the chocolate and allow to stand for a minute or two. Stir with a rubber spatula until smooth. 
  • Add the Kahlua, (if desired) and cover and place in the refrigerator until the truffle mixture is firm (this will take several hours or overnight). 
  • Place your coatings for the truffles on a plate (powdered sugar, cocoa powder, hundreds and thousands, sprinkles, coconut, chocolate shavings, etc). Remove the truffle mixture from the refrigerator. With your hands, a small ice cream scoop, a melon baller, or a small spoon form the chocolate into bite-sized balls. Roll the truffle in the coating and place on a parchment lined baking sheet or tray. Cover and place in the refrigerator until firm. Truffles can be refrigerated for a couple of weeks or else frozen for a couple of months. Bring to room temperature before serving.

Saturday, July 16, 2011

Three Layer Chocolate Cake with Cream Cheese Frosting


I made this cake this past Monday for a party at my grandparent's house! I was supposed to go by a grocery store and get a chocolate cake with white icing, but I decided to make one myself instead! I had a hard time deciding between cream cream frosting and buttercream icing, but I had several packs of cream cheese that I needed to use up, so I went with the cream cheese frosting. Icing recipes are extremely versatile: you can change the amount of powdered sugar (depending on how sweet you want it) and vary the types of flavorings you put in it (vanilla extract, orange extract, etc).  


As I was tapping out the excess flour in my pans, I noticed a perfectly shaped heart!


Don't worry, the batter is supposed to be runny. I actually forgot the hot coffee until the last minute, but luckily there was some leftover coffee in the coffee pot that I heated up and mixed in.


I had the most nerve-wracking time trying to figure out the placement of the cakes in the oven. I have a gas range and an electric oven that will switch to convection, but I had no idea which to use. I know convection is better, but I couldn't figure out whether to turn the temperature down or change the time or the recipe or anything. I finally got so confused that I just put them in the oven (2 on top, 1 on bottom) and left it. About halfway through the cooking time, I put it on convection and reversed the position of the cakes. They turned out all right even though I was constantly messing with them, thank goodness!


I miscalculated just how much frosting I needed to ice this cake at first, and I ended up doubling the recipe. But doubling icing isn't a big deal, you just mix it all back in together to get the color uniform when you're done.


I cut the dome off of the top of the cakes to make them look more professional, and I put a crumb coat on all three of my layers to avoid getting unsightly crumbs in my frosting. Just put a very, very thin coat of frosting on the cakes, and chill for about 30 minutes. Then take them out and frost as usual!


When I begin to put the cake together, I noticed that the cake was leaning slightly, and I put 3 bamboo skewers in it to keep the layers from slipping off. I cut the skewers slightly below frosting level so they wouldn't be seen in the finished product. Be careful when cutting the skewers; I pinched my finger all three times with the scissors! It was totally worth it though. I'm not sure exactly how much icing I used in between the layers, but there is plenty of icing to go around, so don't worry about running out. If you were feeling particularly fancy, you could put chocolate mousse, jam, curd, ganache, or stiffly whipped cream between the layers. I would have, but sadly I was short on time. Get creative!


Oh, and this cardboard cake circle was a life saver in moving the cake from refrigerator to table to cake plate and back again. I got mine at Wal-Mart and they are Wilton brand. I used the 10 inch one. I found a piping bag and several tips and dyed the icing a slightly deeper shade of blue for the decorations. I used a star tip and a basketweave tip. Next time, I'll go slower and let the icing chill for a longer period of time.


The cake turned out wonderful and was absolutely delicious! I can't wait to make another cake recipe and test out my re-found icing skills. But I have been re-reading Chez Panisse, a book about Alice Waters, the slow food movement, and her Berkeley restaurant, so I am probably going to do a French inspired dessert next week. Perhaps a tart? I guess we'll see!


Cake Ingredients:
  • 1 cup (2 sticks) unsalted butter, softened at room temperature
  • 3 cups light brown sugar, packed
  • 4 eggs
  • 2 teaspoons vanilla extract
  • 3/4 cup unsweetened cocoa powder
  • 1 tablespoon baking soda
  • 1/2 teaspoon salt
  • 3 cups sifted cake flour
  • 1 1/3 cups sour cream
  • 1 1/2 cups hot coffee
Frosting:
  • 4 (8 ounce) packages cream cheese, softened
  • 1 cup butter (2 sticks), softened
  • 5 cups sifted confectioners' sugar
  • 2 teaspoons vanilla extract


DIRECTIONS
  • Preheat the oven to 350 degrees. Butter and flour 3 (9-inch) cake pans (I use shortening). Cut 3 circles of waxed paper or parchment paper to fit the bottoms of the pans, then press them in.
  • In a mixer fitted with a whisk attachment (or using a hand mixer), cream the butter until smooth. Add the sugar and eggs and mix until fluffy, about 3 minutes. Add the vanilla, cocoa, baking soda and salt and mix. Add 1/2 of the flour, then 1/2 of the sour cream and mix. Repeat with the remaining flour and sour cream. Drizzle in the hot coffee and mix until smooth. The batter will be thin. 
  • For the frosting: In a large bowl, cream together the cream cheese and butter until creamy. Add your food coloring or gel if you choose to do so. Mix in the vanilla, then gradually stir in the confectioners' sugar. Store in the refrigerator after use to make sure that it doesn't get runny, which cream cheese frosting is prone to do if it gets warm.
Assembly:
  • Line up the three cakes and carefully and evenly slice off the domes to ensure a more professional, bakery look. Then ice the cakes with a crumb coat, and chill for 30 minutes. Take out and fill between the layers with frosting, then insert cut bamboo skewers into the cake for support. Finish icing the cake, and decorate further if desired. Put cake in fridge until time to serve.