Showing posts with label fruit. Show all posts

Tuesday, May 22, 2012

Lemon Blueberry Cupcakes


This is a copy of my first ever guest post from yesterday on Coupon Savings in the South:

Hey everyone! I'm Kara from A Dessert a Week, and this post marks a very special milestone in my blogging life! It is my first guest post and this is also my blogiversary post! I knew I had to make something super special for it, and after searching through countless desserts online and in cook books, I found the perfect, easy recipe. These lemon blueberry cupcakes are the perfect way to welcome a celebration, whether it is a blogiversary, a graduation, or the beginning of summer. The frosting has the perfect tang of lemon without being overwhelming, and the juicy blueberries offer the ideal sweet contrast. They were so perfect, in fact, that I actually ate two within the first five minutes. Trying to stay fit is difficult when I am always around so many delicious desserts!


Lately, I’ve been getting into the local food movement. I am a Human Nutrition major, and much emphasis is placed on eating fresh, locally-sourced produce. A fantastic place to go if you are in upstate South Carolina is the Bush-N-Vine. It is located in Filbert, South Carolina and is run by the Hall family. For the past several weeks, I have been picking up buckets of their delicious strawberries to use in recipes such as strawberry lemonade, strawberry soup, and double-crusted strawberry pie. I will have a recipe for the strawberry lemonade up very soon, so be sure to check back. They were fresh out of blueberries, but I did manage to pick up some reasonably priced lemons.


Cupcakes are generally very easy to make, and this recipe was no exception. I beat the sugar, butter, and lemon zest, then added the eggs, vanilla, and lemon juice. I alternated the milk and flour mixture, and then gently folded in the flour-dusted blueberries. I used a standard ice cream scoop to place the batter in the cupcake papers and into the oven they went.


Also, if anyone has any summertime favorites they’d like to see featured on A Dessert a Week, please don’t hesitate to let me know via my Facebook page or through e-mail (kelowman@gmail.com). I love to test out new recipes!


I used to skip the step about flouring fruit before I placed it into cakes or cupcakes, but after having one too many desserts come out where all of the fruit sank to the bottom, I decided to pay attention to that part of the recipe. It works so well!


 The eggs in the above photograph are pale blue/green in color. They came from my nana, which has several different breeds of chicken on her farm, and some lay blue eggs. They are absolutely beautiful in person, and the yolks are a deep orangey yellow hue from their diet. I also have three white Chinese Silkies at my house, but their eggs are way too small to use in baking recipes.


I normally don’t work with cream cheese frosting, so icing these cupcakes was a bit of a challenge for me. Also, I couldn’t find my favorite large star tip, so I had to use a plain tip. Cream cheese frosting doesn’t hold up as well as buttercream frosting, but I got the hang of it. However, you may want to refrigerate the cupcakes as quickly as possible if you are working on an extremely hot day because they may melt just a little bit.


These are my second favorite cupcakes I have ever made, the first being myGanache-Filled Chocolate Raspberry Cupcakes. I actually just ate another one while writing this post ;)


Thank you to Shannon for letting me guest post this week on Coupon Savings in the South! If you would like to see more recipes weekly, please check out my Facebook page, A Dessert a Week, and my website, www.adessertaweek.blogspot.com. Enjoy!


Lemon Blueberry Cupcakes
Barely adapted from Annie’s Eats
Yield: about 16 cupcakes

INGREDIENTS
For the cupcakes:
  • ¾ cup plus 2 tbsp. all-purpose flour, divided
  • ¾ cup cake flour
  • 1½ tsp. baking powder
  • ¼ tsp. salt
  • 8 tbsp. unsalted butter, at room temperature
  • ¾ cup plus 2 tablespoons sugar
  • Zest of  1 lemon
  • 2 large eggs, at room temperature
  • 1 tsp. vanilla extract
  • 2 tbsp. lemon juice
  • ½ cup plus 2 tbsp. milk, at room temperature
  • 1 cup fresh blueberries

For the frosting: 
  • 8 oz. cream cheese
  • 5 tbsp. unsalted butter, at room temperature
  • 3 1/4 cups confectioners’ sugar, sifted
  • 1 tbsp. freshly squeezed lemon juice
  • Zest of 1 large lemon
  • Additional fresh blueberries, for garnish

DIRECTIONS
  • Preheat the oven to 350˚ F. Line cupcake pans with paper liners. In a medium bowl, combine the ¾ cup all-purpose flour, the cake flour, baking powder and salt; whisk together and set aside. In the bowl of an electric mixer, combine the butter, sugar and lemon zest. Beat together on medium-high speed until light and fluffy, about 2-3 minutes. Beat in the eggs one at a time, blending well after each addition. Beat in the vanilla and lemon juice. With the mixer on lowspeed, mix in half of the dry ingredients just until incorporated. Blend in the milk. Mix in the remaining dry ingredients, beating just until incorporated.
  • In a small bowl, toss the blueberries with the remaining 2 tablespoons of all-purpose flour. Using a spatula gently fold the berries into the cake batter. Divide the batter evenly between the prepared liners, filling each about ¾ full. Bake 20-22 minutes, or until a toothpick inserted in the center comes out clean. Let cool in the pans 5 minutes, then transfer to a wire rack to cool completely.
  • To make the frosting, combine the cream cheese and butter in the bowl of an electric mixer. Beat on medium-high speed until well combined and smooth, about 2-3 minutes. Mix in the lemon juice and lemon zest. Gradually beat in the confectioners’ sugar until totally incorporated, increase the speed and then beat until smooth. Frost cooled cupcakes as desired. (I used a large plain tip to frost these cupcakes.) Garnish with fresh blueberries.

Wednesday, April 11, 2012

Lime Meltaways


As some of y'all may know, I love the tart, citrusy flavor of lime. I've even been known to eat limes straight with sugar or salt! And these cookies are absolutely perfect for those citrusy types of cravings. They are called meltaways because of the way they, well, melt in your mouth. The powdered sugar called for in the recipe contributes to this melty sort of texture. If you have access to key limes, then by all means use them. I can never find key limes at my local stores though, if any locals can help, please let me know!


I love my microplane zester, but be careful when using it because I have cut myself more than once!


Sorry that I haven't been posting, this semester has been extremely difficult, and I have been using all of my energy to keep up with my classes! Once my summer begins (in three weeks), I will be back to posting weekly or even bi-weekly, depending on how much baking I will be doing. Thank you for being so understanding about my unintended hiatus!


Lime Meltaways

Yield: 5 dozen

12 tablespoons (1 1/2 sticks) unsalted butter, room temperature
1 cup confectioners’ sugar
Grated zest of 4 tiny or 2 large key limes
2 tablespoons freshly squeezed lime juice
1 tablespoon pure vanilla extract
1 3/4 cup plus 2 Tablespoons all-purpose flour (a.k.a. 2 cups minus 2 tablespoons)
2 tablespoons cornstarch
1/4 teaspoon salt

1. In the bowl of an electric mixer fitted with the whisk attachment, cream butter and 1/3 cup sugar until fluffy. Add lime zest, juice, and vanilla; beat until fluffy.

2. In a medium bowl, whisk together flour, cornstarch, and salt. Add to butter mixture, and beat on low speed until combined.

3. Between two 8-by-12-inch pieces of parchment paper, roll dough into two 1 1/4-inch-diameter logs. Chill at least 1 hour.

4. Heat oven to 350 degrees. Line two baking sheets with parchment. Place remaining 2/3 cup sugar in a resealable plastic bag. Remove parchment from logs; slice dough into 1/4-inch-thick rounds. Place rounds on baking sheets, spaced 1 inch apart.

5. Bake cookies until barely golden, about 15 minutes. Transfer cookies to a wire rack to cool slightly, just three or four minutes. While still warm, place cookies in the sugar-filled bag; toss to coat. Bake or freeze remaining dough. Store baked cookies in an airtight container for up to 2 weeks.

Saturday, December 3, 2011

Crustless Cranberry Walnut Pie


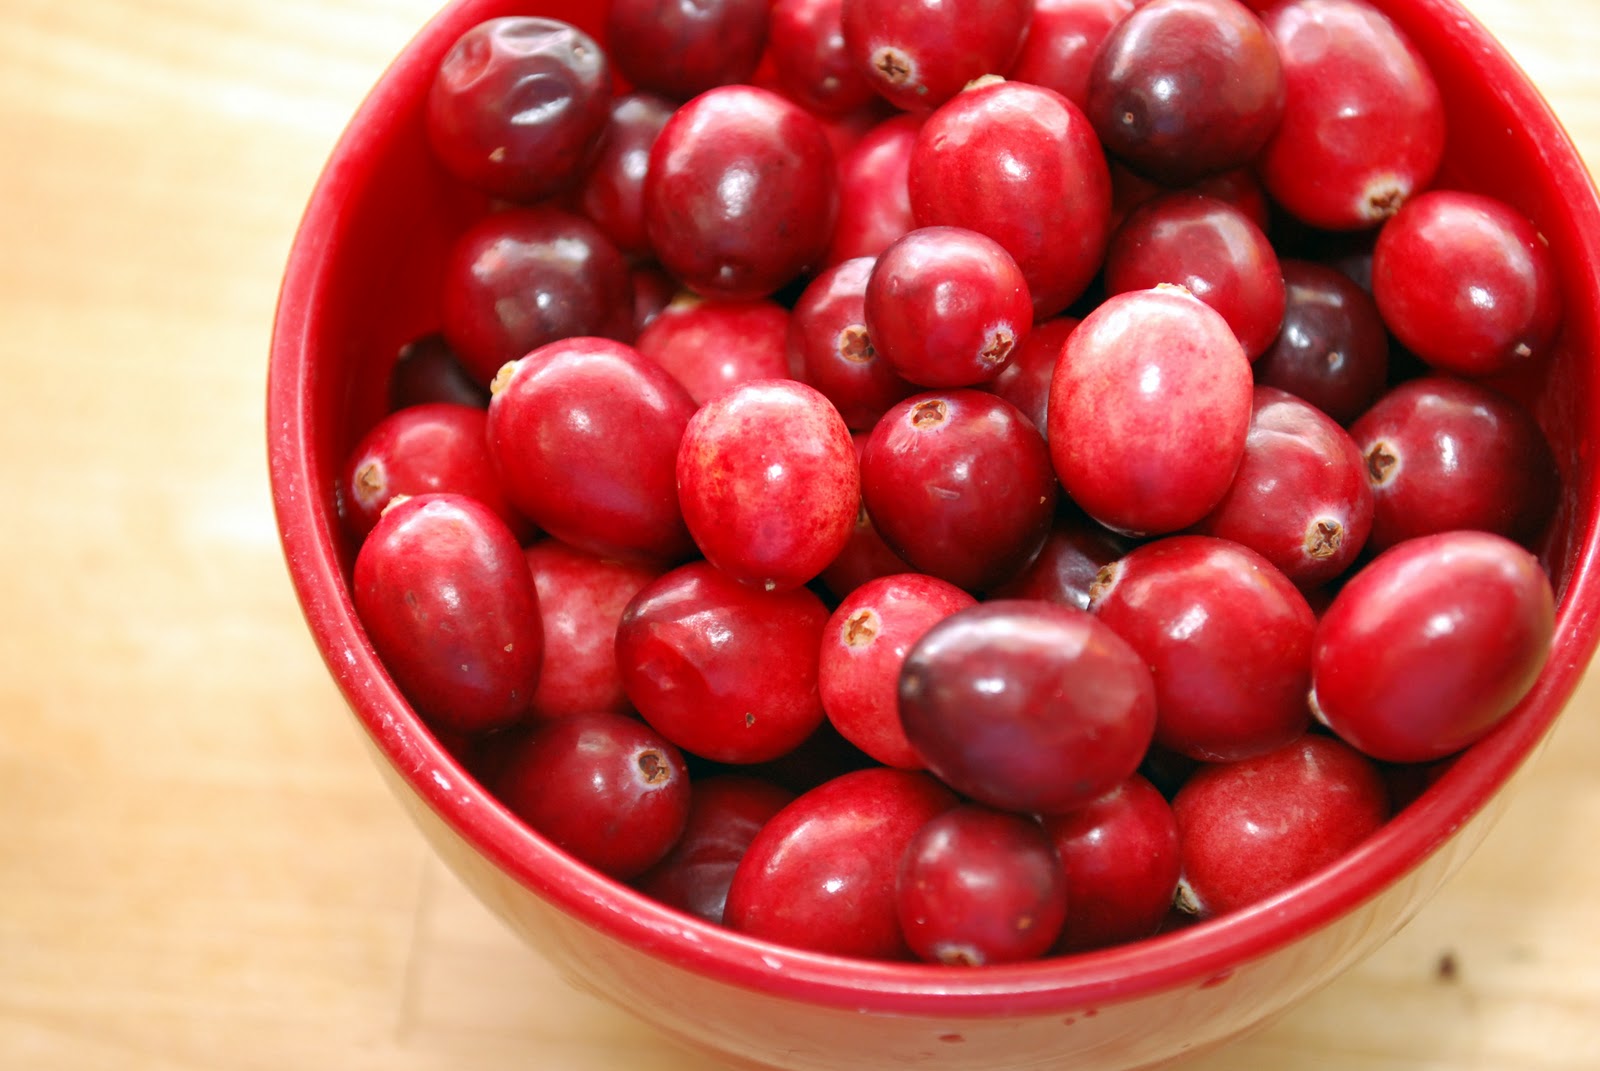
I bought three days of cranberries the other day, (hey, they were on sale for 99 cents apiece, what was I supposed to do?) so I knew I needed to get a hold of some great cranberry-involving recipes as soon as possible. This recipe was really, really good. The cranberries were just tart enough to counteract the sweetness of the cake/pie. It's called a pie, but it's basically a thin cake to me. My brother happened to be home this weekend, so this dessert was gone within 12 hours! 


I had some cranberries left over, so I froze them in the bag to use in future recipes. Does anyone know what a raw cranberry tastes like? I thought about trying to eat one, but I couldn't get up the nerve! Homework and classwork has pretty much been taking over my life for the past week- two tests, two oral presentations, a portfolio due, and a paper- BUT I got it all done, and I have all As in my classes going into finals, which start this Wednesday. I can't wait for winter break! I'll have so much more time for baking and planning products for my Etsy store. I already know I'm going to sell vintage kitchen items, recipe cards, and dinner menus, but beyond that, I have no clue.


Friday, August 26, 2011

Fig Galette


Lately, I have been on a dough kick. Ever since I discovered the perfect dough recipe, I had been using it as much as I can: in tarts, pies, galettes, you name it. If the directions at the bottom seem too complicated, believe me, it really isn't at all. The dough and the frangipane are so simple that they basically make themselves. And people will think that you are fancy if you throw out all of those French names and terms. It's a win-win!


Also, if you don't have a food processor...this could possibly be done in a blender. I have no idea. If anyone is brave enough to attempt it, please let me know! By the way, in case any of you were wondering, my first week of college has gone great so far! 7 classes this semester, and 4 of them are Human Nutrition classes. I already know I'm going to be super busy, but it'll be worth it.


I'm not sure what type of figs these are....I bought them from my local produce place called the Bush-N-Vine, and I suspect that they are Black Mission Figs. I think the type of fig I used in the other galette was a Turkish Fig.


You can arrange your figs any way that you would like. I arranged them differently each time I made the recipe. Don't stress too hard.


I should have left more room around the edges so that I could fold the galette over, but I forgot. As a result, a little bit of the fig juice leaked out, but it wasn't enough to affect the final product. This is an extremely unpretentious dessert, and it will forgive you if you make mistakes. And the silicone mat that I used in the recipe is so fantastic. It is a little pricey, but definitely worth the money; I can tell the difference between cookies/tarts/galettes baked on it and on parchment paper. 


I made the galette below with a different type of the fig that in the photographs above. I made two galettes because I had a lot of leftover ingredients and because the first one was so delicious! The crust is so buttery and flaky, and the sugar in the figs caused them to caramelize slightly. 


I used an icing spatula to fold the edges of the dough over; it made it so much easier.


Fig Galette
Adapted from Chez Pim


Frangipane Ingredients:


  • 75g whole almonds (about 1/2 cup)
  • 75g sugar, you can use half granulated sugar and half confectioner’s sugar, or just all granulated sugar (about 1/8 cup granulated plus 1/4 cup confectioner’s, or just 1/3 cup granulated)
  • 75g butter at room temperature
  • 1 large egg
Directions for Frangipane:
  • Preheat the oven to 350F (180C).  Spread the almonds evenly on a baking sheet and place them in the oven.  Roast them for about 10 minutes, or until slightly toasted and fragrant.  Transfer to a plate and let cool to room temperature.
  • Put the cooled almonds and the sugar into a food processor and process until fine.  Add the butter and the egg and pulse until well-combined.  If you don’t want to use it right away, divide the frangipane into four equal parts, wrap each tightly in plastic.  They will keep in the fridge for a couple of days, and up to a month in the freezer.
Pastry Dough Ingredients (makes two 9 inch rounds):
This dough was also used in the Nectarine Lattice Pie post!
  • 2 1/2 cups all purpose flour
  • 1 tablespoon granulated sugar
  • 3/4 teaspoon salt
  • 1 cup (2 sticks) unsalted butter, cut into 1/2 inch cubes
  • 5 tablespoons (or more) ice water
  • Milk for crust
  • 1 tbsp. sugar
Directions
  • For the crust: whisk sugar, flour, and salt in a large bowl to blend. Add the butter and rub in with fingertips (or a pastry blender) until small pea-sized lumps form. Add 5 tablespoons of ice water. Mix lightly with a fork until the dough holds together when small pieces are pressed between fingertips. Add ice water by the teaspoon if too dry. Gather dough into a ball, and divide in half. Flatten each half into a disk, wrap separately in plastic wrap, and chill for at least 30 minutes. This can be made two days ahead, just make sure to let it soften slightly at room temperature before rolling out.
To make a 9″ fig tart


  • 1 9″ pie dough listed above
  • about 10 large figs or about 15 small ones
  • 1/4 the recipe of frangipane above
Directions


  • Preheat the oven to 400F (200C).  Roll out your pastry dough to about 10-inch diameter – more or less won’t harm anything.  Spread about 1/4 of the quantity of frangipane on the dough, leaving about 1 inch parameter around the outer edge of the dough.  
  • Quarter the figs (only halve if small) and arrange them -pointy end up will be prettier- in concentric circles to cover the frangipane.  Fold the edges in, pinching a little to make sure they stick.  If you want, you can brush the dough with eggwash and give it a good shower of sugar.  Bake for about 45-50 minutes, or until the pastry edges are golden brown.

Monday, August 15, 2011

Kara's Buttermilk Peach Cobbler


Wow, this week has been so busy. Yesterday, (when I normally would've posted this week's recipe) I was on the way to Charleston to take my best friend to college. Putting together a room with all new, pretty stuff is always fun, but the trip was still emotionally exhausting. Plus, it foreshadows my move-in date at my new school this coming Friday, and I am not looking forward for the summer to end. I left my summer job a few days ago, and am working harder than ever on getting my website up and running, and brainstorming ideas for my Etsy store. Within the next month, I will have all sorts of fun things for sale: some handmade, some vintage picks, and photography. The majority of the items will be centered around baking, cooking, and food in general. I'm really excited about the direction that I'm moving in; I just wish that I could do everything at once to get it ready faster! This week's recipe was made with a tiny peach tree that has been growing in my front yard for 5-6 years. The peaches this year were finally edible, so I decided to make something that would showcase them. Oh side note, I just discovered that my college just assigned me a new roommate......four days before I move in. And they already messed up with my supposed-to-be roommate before this with rooming. Fantastic! So they are going to get a piece of my mind at 2:00 when we both go up there. Not to rant, but I am sick of this school messing stuff up for me. Just do your job, PLEASE. Anyways, I didn't have enough milk for the original recipe, so I substituted out some baking soda and buttermilk instead, and it turned out fantastic. You could do this recipe with any sort of stone fruit, but peaches are the best!


Boiling the peaches, then placing them in ice-water is the easiest way to remove the skin.


These peaches, probably because they were small peaches from a young tree, weren't quite as sweet as fruit from mature fruit trees, but they were still delicious.


This is my favorite and best tasting recipe on A Dessert a Week yet! This would be great served with whipped cream or vanilla ice cream.


Ingredients

  • 4 cups peeled, sliced peaches
  • 1 3/4 cups sugar, divided
  • 1/2 cup water
  • 8 tablespoons butter
  • 1 1/2 cups self-rising flour
  • 3/4 cup milk
  • 3/4 cup buttermilk
  • 1/4 tsp baking soda
  • Ground cinnamon, optional
Directions
  • Preheat oven to 350 degrees F. Combine the peaches, 1 cup sugar, and water in a saucepan and mix well. Bring to a boil and simmer for 10 minutes. Remove from the heat. Put the butter in a 3-quart baking dish and place in oven to melt.
  • Mix remaining 1 cup sugar, flour, and milk slowly to prevent clumping. Pour mixture over melted butter. Do not stir. Spoon fruit on top, gently pouring in syrup. Sprinkle top with ground cinnamon, if using. Batter will rise to top during baking. Bake for 30 to 45 minutes.